

Garden Guest Suite Kitchen + Bathroom Renovation Sources
Here’s a list and gallery of links for what we used to rebuild and furnish our garden guest suite kitchen. The goal here was to renovate simply and affordably but with a sense of historic charm.


Construction Materials + Furnishings


Garden Guest Suite Renovation Reveal Pt.2
Well here we are a few weeks later and finally sharing the kitchen renovation details! The garden level of our Brownstone is basically split into two sections - the front living room/bedroom and the back kitchen with the bathroom sandwiched between.
The whole floor needed a big facelift with repaired/restored walls, window replacement, trimwork, tilework and a whole new kitchen cabinet setup. Not to mention there was an enormous addition on the back of the house that was literally rotting and needed to be torn down. The backyard/garden still needs a lot of love, but for now its at least useable and free of debris (mostly.)

Kitchen stove view featuring our vintage feeling General Electric stove, IKEA cabinet suite and wainscoting painted in Benjamin Moore’s Grand Teton White.

While trying to maintain a sense of lightness in an otherwise dark room we kept things in shades of white (including the retro style fridge.) We liked punching in light wood tones through accents like the knobs and Oak Veneer countertop. This warmed everything up. The apron sink and faucet are from IKEA as well. The Dishwasher is integrated and from IKEA.
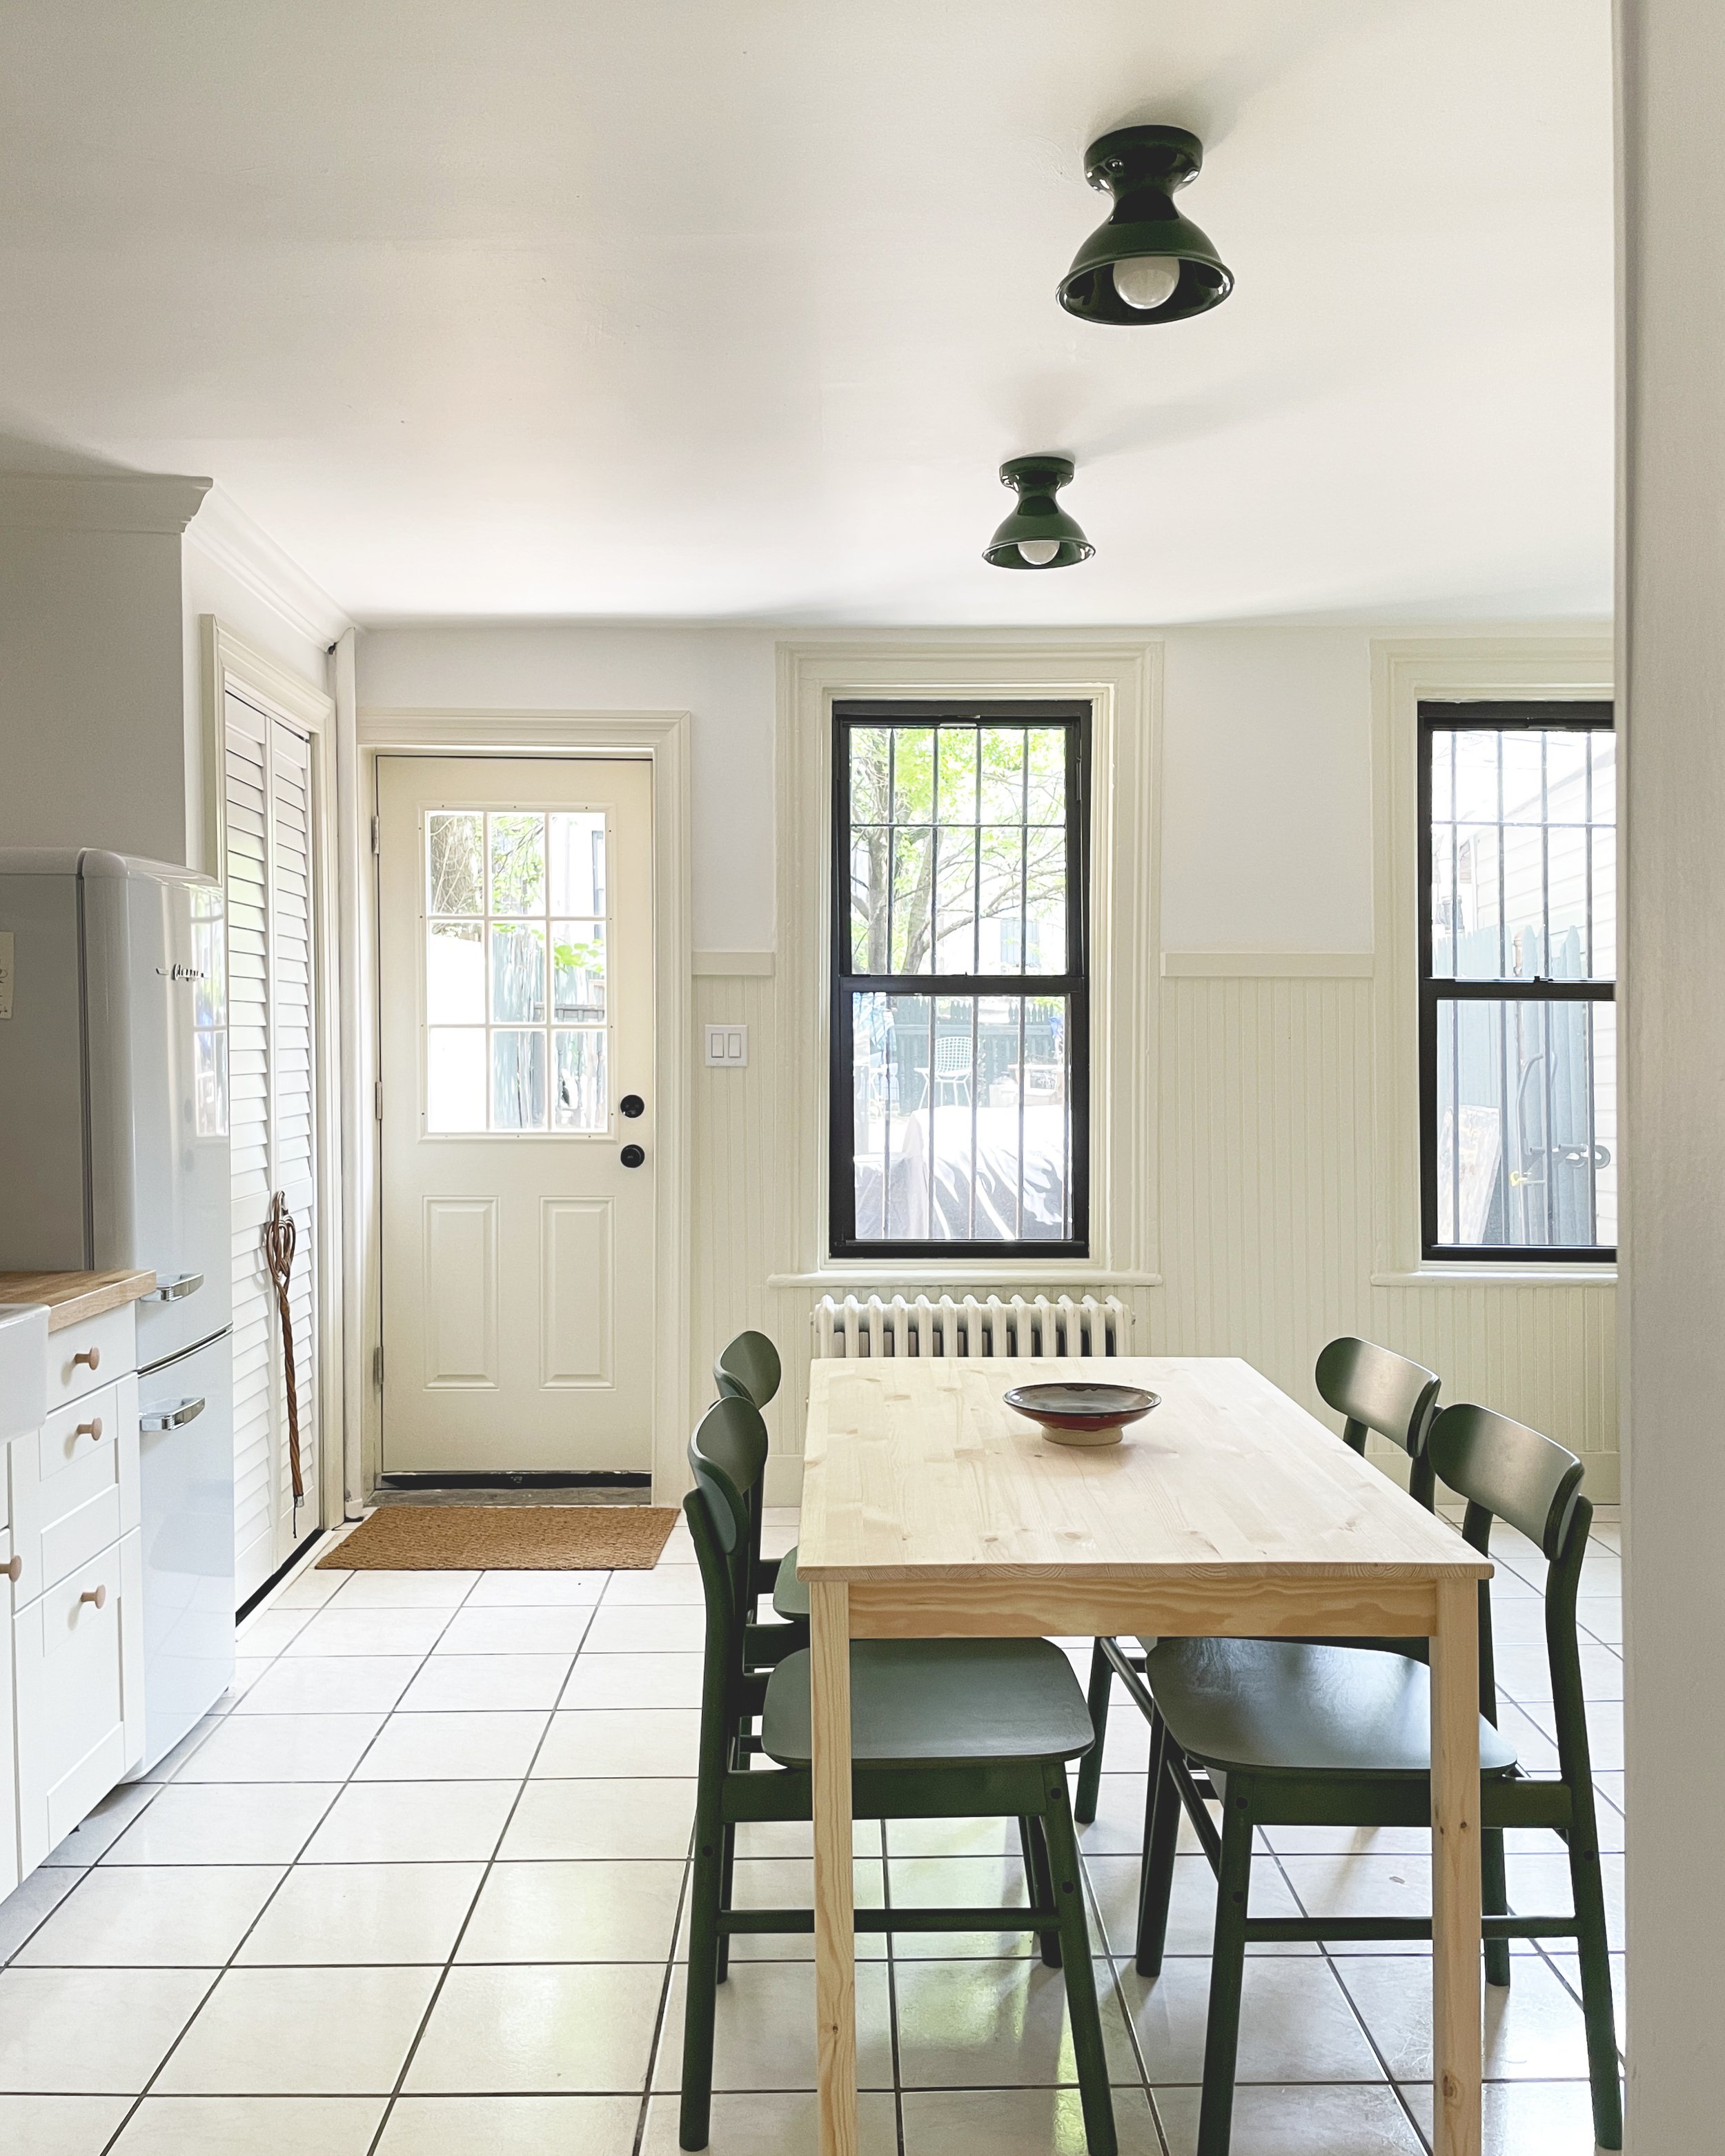
The floors are from a prior renovation that we decided to keep to save money. Windows and doors (both back door and laundry door) are new. The vintage feeling flushmount lights bring in some much appreciated color while the dining chairs follow suit! The back door is a steel prehung door in the smallest size possible, 28”. We painted this in Grand Teton White to connect to the wainscoting and window trim.
We originally wanted to relocate the kitchen to the front room so that this back area could be a big bedroom, but to save money it made sense to keep utilities where they are. It seems funny to have such a big kitchen in proportion to the rest of the apartment, but in a way it makes it more versatile. When we’re not renting out the unit as an airbnb, we can use it for entertaining! We just had a BBQ last weekend and it was the perfect setup.

Our initial drawing where we designed it to include a new fireplace mantel (maybe later?) and a weird closet that we did not include. New things that WERE added were a stacking washer/dryer closet and the wall separating the shared vestibule and the inner apartment area. This way we could still access the cellar from the inner stairhall and not disturb the tenants.
KITCHEN BEFORE: First thing we had to do was update the electrical to code and gut out the moldy sheetrock and replace it with new greenboard. This meant getting rid of the ugly wall tile and the 90’s cabinets. The ceiling pendants had to go too! The windows were replaced with new aluminum ones and the radiator was refitted and painted. Every inch was touched!

For some reason we thought we could keep this kitchen as is for a little while, but the closer we looked the more we realized that it needed a serious update to feel clean and comfortable.


We were very excited to turn an old closet into a Washer/Dryer closet! Being able to do laundry in your unit, even an airbnb, is such a nice perk! Especially for us when we’re cleaning sheets and towels, not having to lug everything upstairs is a luxury.
To keep costs low(er) we decided to build out the new kitchen using IKEA’s planner tool. They’re cabinets are actually really great for the price and easy to assemble. We were excited to include a full-size dishwasher to this unit for when we throw parties. Our hope was to make this kitchen feel modern functionally, but restore some of the charm that was lost from prior renovations. This meant incorporating texture and warmth (and a little bit of a historical vibe) through wood finishes and vintage shapes. The wainscoting really tied the whole space together, especially after we painted the window and door trims the same color!


The mood board for our kitchen renovation. We wanted our space to feel layered with habitation - revealing layers of living through the decades (as most older homes do if they survive multiple owners), so it felt right to bring back some turn-of-the-century wainscoting and lighting, incorporate mid-century appliances and finish with some modern furniture pieces not seen here. Shop this mood board here


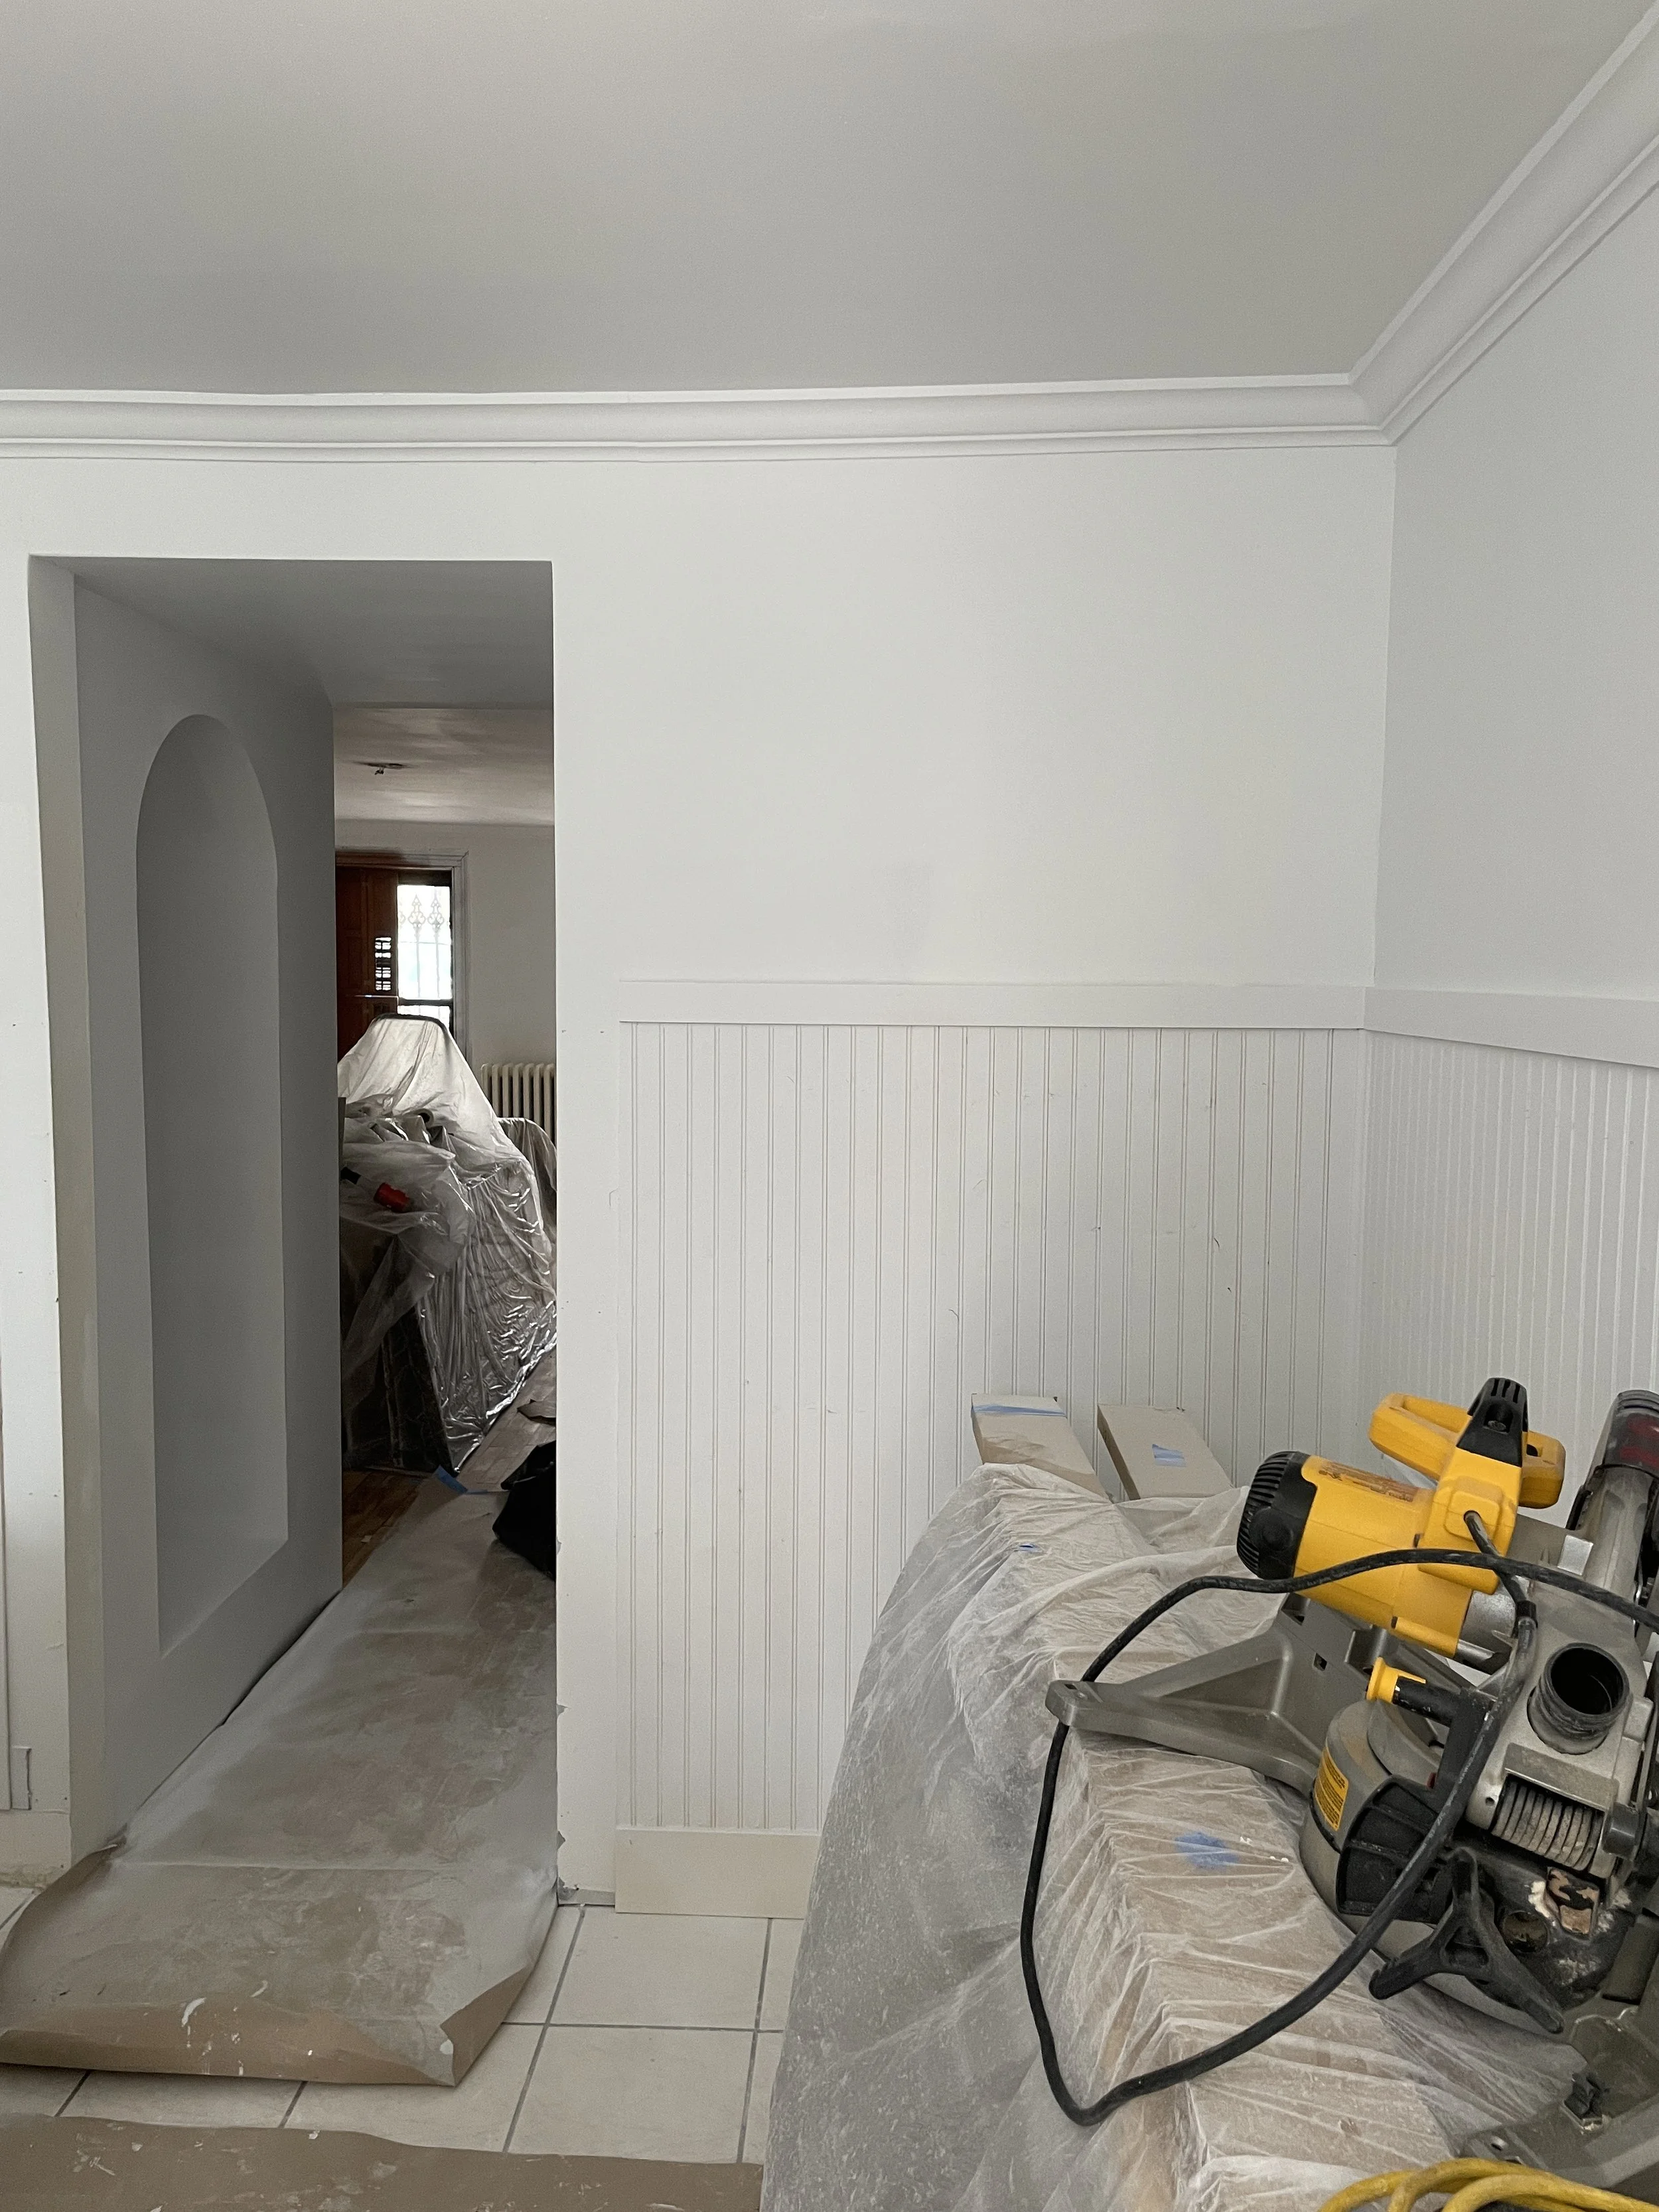


We purchased the wainscoting from Home Depot and the Corbel brackets from Lowes. The shelf (1 x 8 x 10), baseboard (1 x 6) and rail (3/4 x 1 x3) were just Pine lumber from Home Depot. We used primer first, then Grand Teton White on all of the trim and Simply White on the walls, both from Benjamin Moore. The crown molding was really hard to do, but Will is a quick learner! The door trim was also from Home Depot.


We are AirBnB ready with our Nespresso, compostable Nespresso-Style pods, an electric tea kettle, retro-style microwave, weck glass jars, Heath Espresso cups and Chemex coffee carafe.

We love this stacking washer and dryer we ordered from Home Depot. The door is a louvered bi-fold door primed in white.
Stay tuned for a full list of our sources with links!
Garden Guest Suite Renovation Sources Pt.1
Here’s a list and gallery of links for what we used to rebuild and furnish our garden guest suite.


Construction Materials
CMPC - Crown Molding - LWM 49 - 9/16 in. x 3-5/8 in. x 144 in. Pine Primed Finger-Jointed Crown Moulding Pro Pack 60 LF M (5-Pieces)
Alexandria Moulding - Baseboards - 1/2”x5 1/2”x 144” Primed Finger Jointed Pine Wood 4-pack
Dyk’s Lumber - Door Trim - (In person only) See Catalog for fun!
Benjamin Moore - Wall Paint - Super Hide Latex Eggshell in Simply White
Benjamin Moore - Trim Paint - Super Hide Latex Semi-gloss Enamel in Simply White
Krosswood Doors - Door - 30”x80” Shaker 1 Panel Primed Solid Hybrid Core MDF Pre Hung
Kwikset - Entry Door Knob - Venetian Bronze Cove Keyed Entry Door Knob


Garden Guest Suite Renovation Reveal Pt.1
Phew, we did it! We are officially done renovating the Garden Apartment and are currently hosting our second Airbnb guest!
We know a lot of you have been following along as we’ve tackled this project over the past few months, so cheers to all of you for the continued support. There’s plenty more to do but this was a good first pass at making the Garden Apartment a cozy and inviting space. In this blog post we’re going to look at the Living Room/Bedroom.
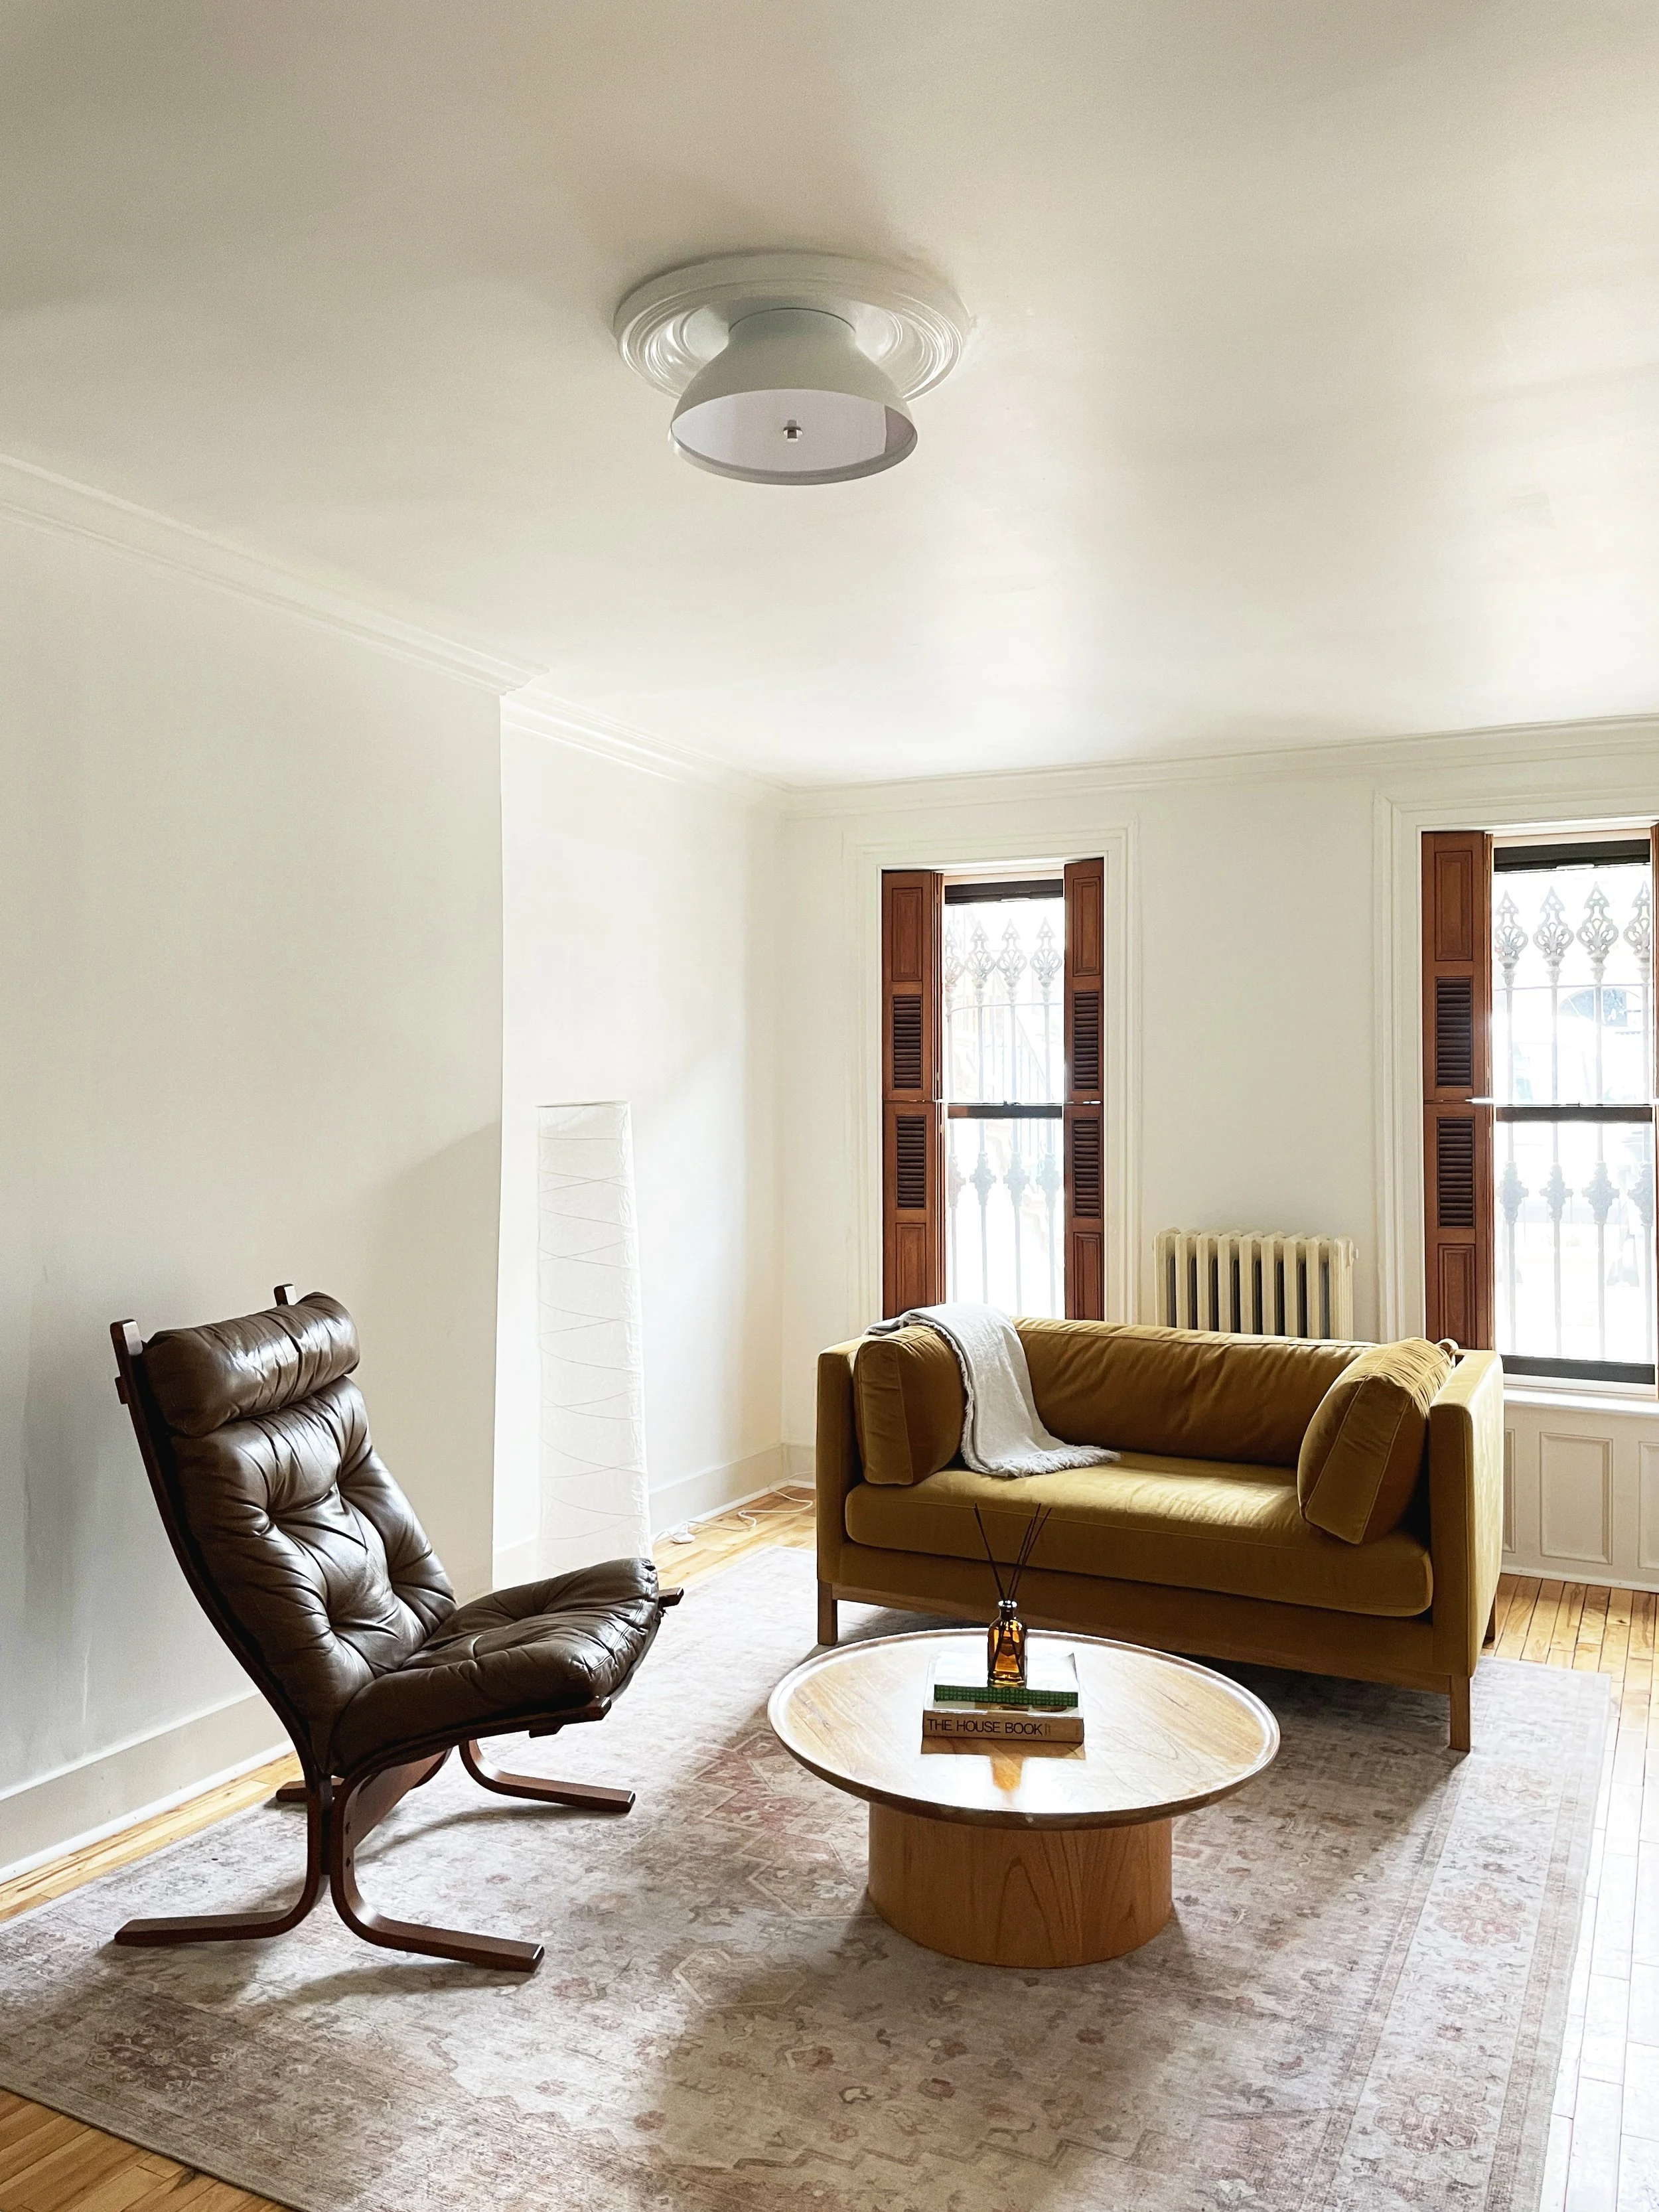
Living Room featuring our Interior Define Jasper sofa and the original pocket shutters. Rug is from Loloi in 8.5 x 11.5. The ceiling medallion is pvc from Ekena Millwork and the celing light is from West Elm.

View from the sofa into the bedroom area. We relocated our vintage Westnofa Lounge chair with ottoman down here and added in a round wood coffee table topped with an Upstate Stock diffuser in the Woods of Onondaga County scent.

We liked the idea that this room would feel like a hotel suite with the bed and the sitting area open to one another. This way we could have more natural light as well! The bedframe and nightstands are designed and built by GLAM in White Oak and the sconces are from IKEA. The table fan is Vortex in cream.
The living room layout is essentially the same as it was when we moved in except for the wall that was missing. We rebuilt the wall to add support back in and then rebuilt the crown molding, doorways with trim, installed new windows, painted and rebuilt the window boxes. If you look at the floor plan below, we haven’t deviated too much from our original proposal. See the gallery below to see the before!

BEFORE: A big priority was adding back in the missing wall (the beam the last owner put in was SHADY) and covering the exposed brick chimney (we hated the weird mantel).


In the gallery below you can see our progress on the wall rebuilding, the entry way and sheetrocking the exposed brick chimney (sorry brick fans!).


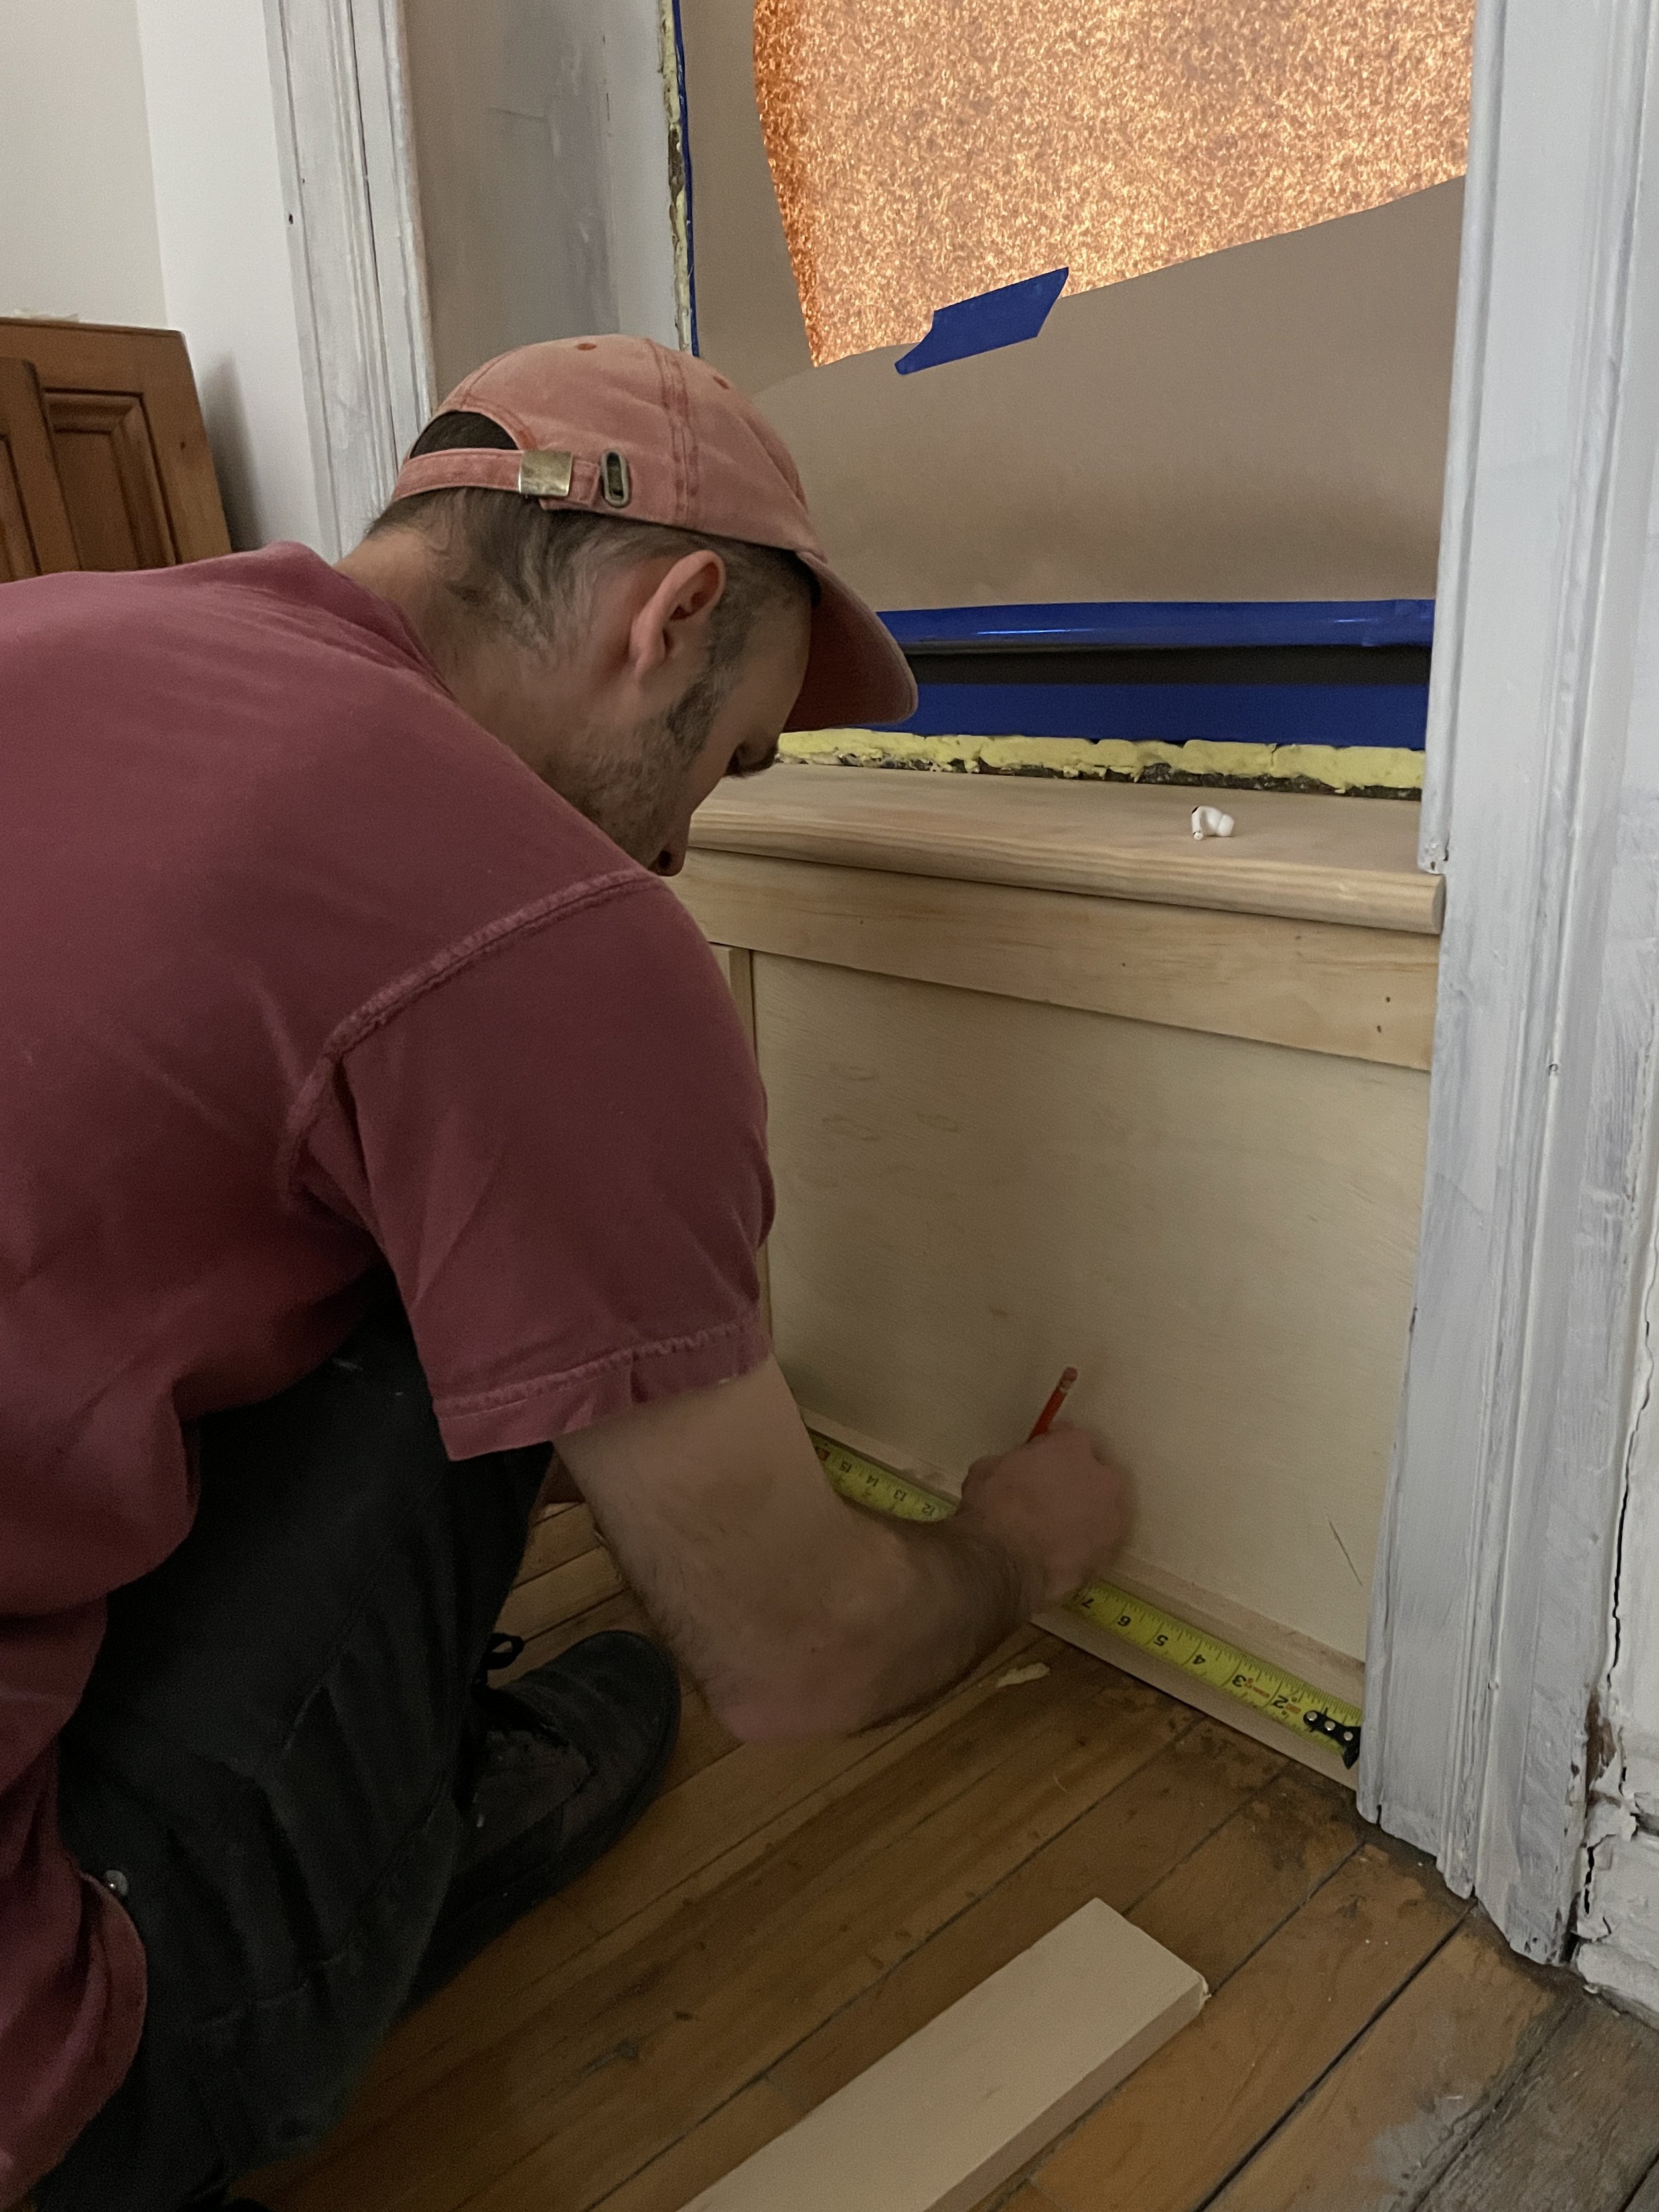
When we moved in the window boxes were in bad shape. The only thing left were some broken stone shelves, the original pocket shutters (paint stripped and all!) and some battered trim. We caulked and painted the surrounding trim, installed new windows, rebuilt the boxes below and cleaned the shutters. It was a labor of love and we’re ecstatic!


Stay tuned for the kitchen reveal next week!
One Room Challenge - Week 3
It’s week 3 of the #oneroomchallenge and we’re excited to share with you our design concept for the kitchen! Originally we had planned on keeping the top floor as the rental, so the foundation for this kitchen remodel is based on simpler details with the opportunity to drum up interest in the floor color and additive decor. We designed the cabinet layout using Ikea’s web design tool to make sure we ordered the correct dimensions and planned on incorporating richer materials like a salvaged butcher block counter, vintage swing lamp and handmade tile to give texture and character. The pale checkerboard Forbo marmoleum flooring might be the scene stealer in its baby blue and buttercream color combo. Make sure to check out our “Shop Our Renovation” section on the website to see links to the product we’re using! Construction is almost done and soon we’ll be painting and installing our flooring. We can’t wait!

Keeping things modern and playful up here felt like the right move, especially with all of the natural daylight that we get coming in from the 3 large windows on the back of the house and the additional skylight above the fridge. Eventually we want to drop the kitchen to the Parlor floor below and alter this small room into a bathroom, so instead of tiling the floor we decided to look at installing cinch n click marmoleum flooring from Forbo. Its easy to install/deinstall, bio-based and water resistant making it a great choice for a utilitarian floor. As you can tell everything is very compact - this will be our 2nd time in our relationship having a 24” range, but I think this time around it’ll be a lot nicer with this Smeg we found on Ebay for 40% off! We’re going to imbed a hidden vent in the cabinet above the stove to make sure everything is circulating properly. Wish us luck with the 18” dishwasher!

The butcher block was found on craigslist and turned out to be a really nice one made of Maple. A little bit of refinishing and oiling is all we’ll need to get it looking really nice! As you can see in the plan we might incorporate a little island with the leftover butcher block counter to give us a wee bit more counter space! Overall we’re really excited to implement this 60’s Victorian intervention feel, with these complimentary colored grids in different patterns with light wood. It’ll feel cozy and vibrant. We feel that the Orion light from Schoolhouse will set that mood perfectly in polished nickel.

For appliances we decided to stick with traditional stainless steel for its minimal, industrious vibe a la Donald Judd paired with hardwood counters and objects like the end grain cutting board that we make (available in our shop!) and the Danish spice grinder in Oak from Schoolhouse. We’re excited to get our samples in for the Fireclay tile that we chose for the backsplash - its called Roundabout 4 in Gesso! It’s from a collaboration with Block Shop Textiles, another favorite West Coast company. We’ll have to wait awhile for those to come in because they are handmade and have a 12 week lead time, but thats okay because the backsplash can go in at any time. I can’t tell you how much we love our Berkey Water Filter and our Technivorm Coffee Brewer - two investment items that we literally use everyday and are obsessed with.


Here are some progress shots from the upstairs! Walls are hung and mudded but the trim unfortunately still looks pretty bad so we’re searching for an alternative path forward with those…wish us luck!
One Room Challenge - Week 2
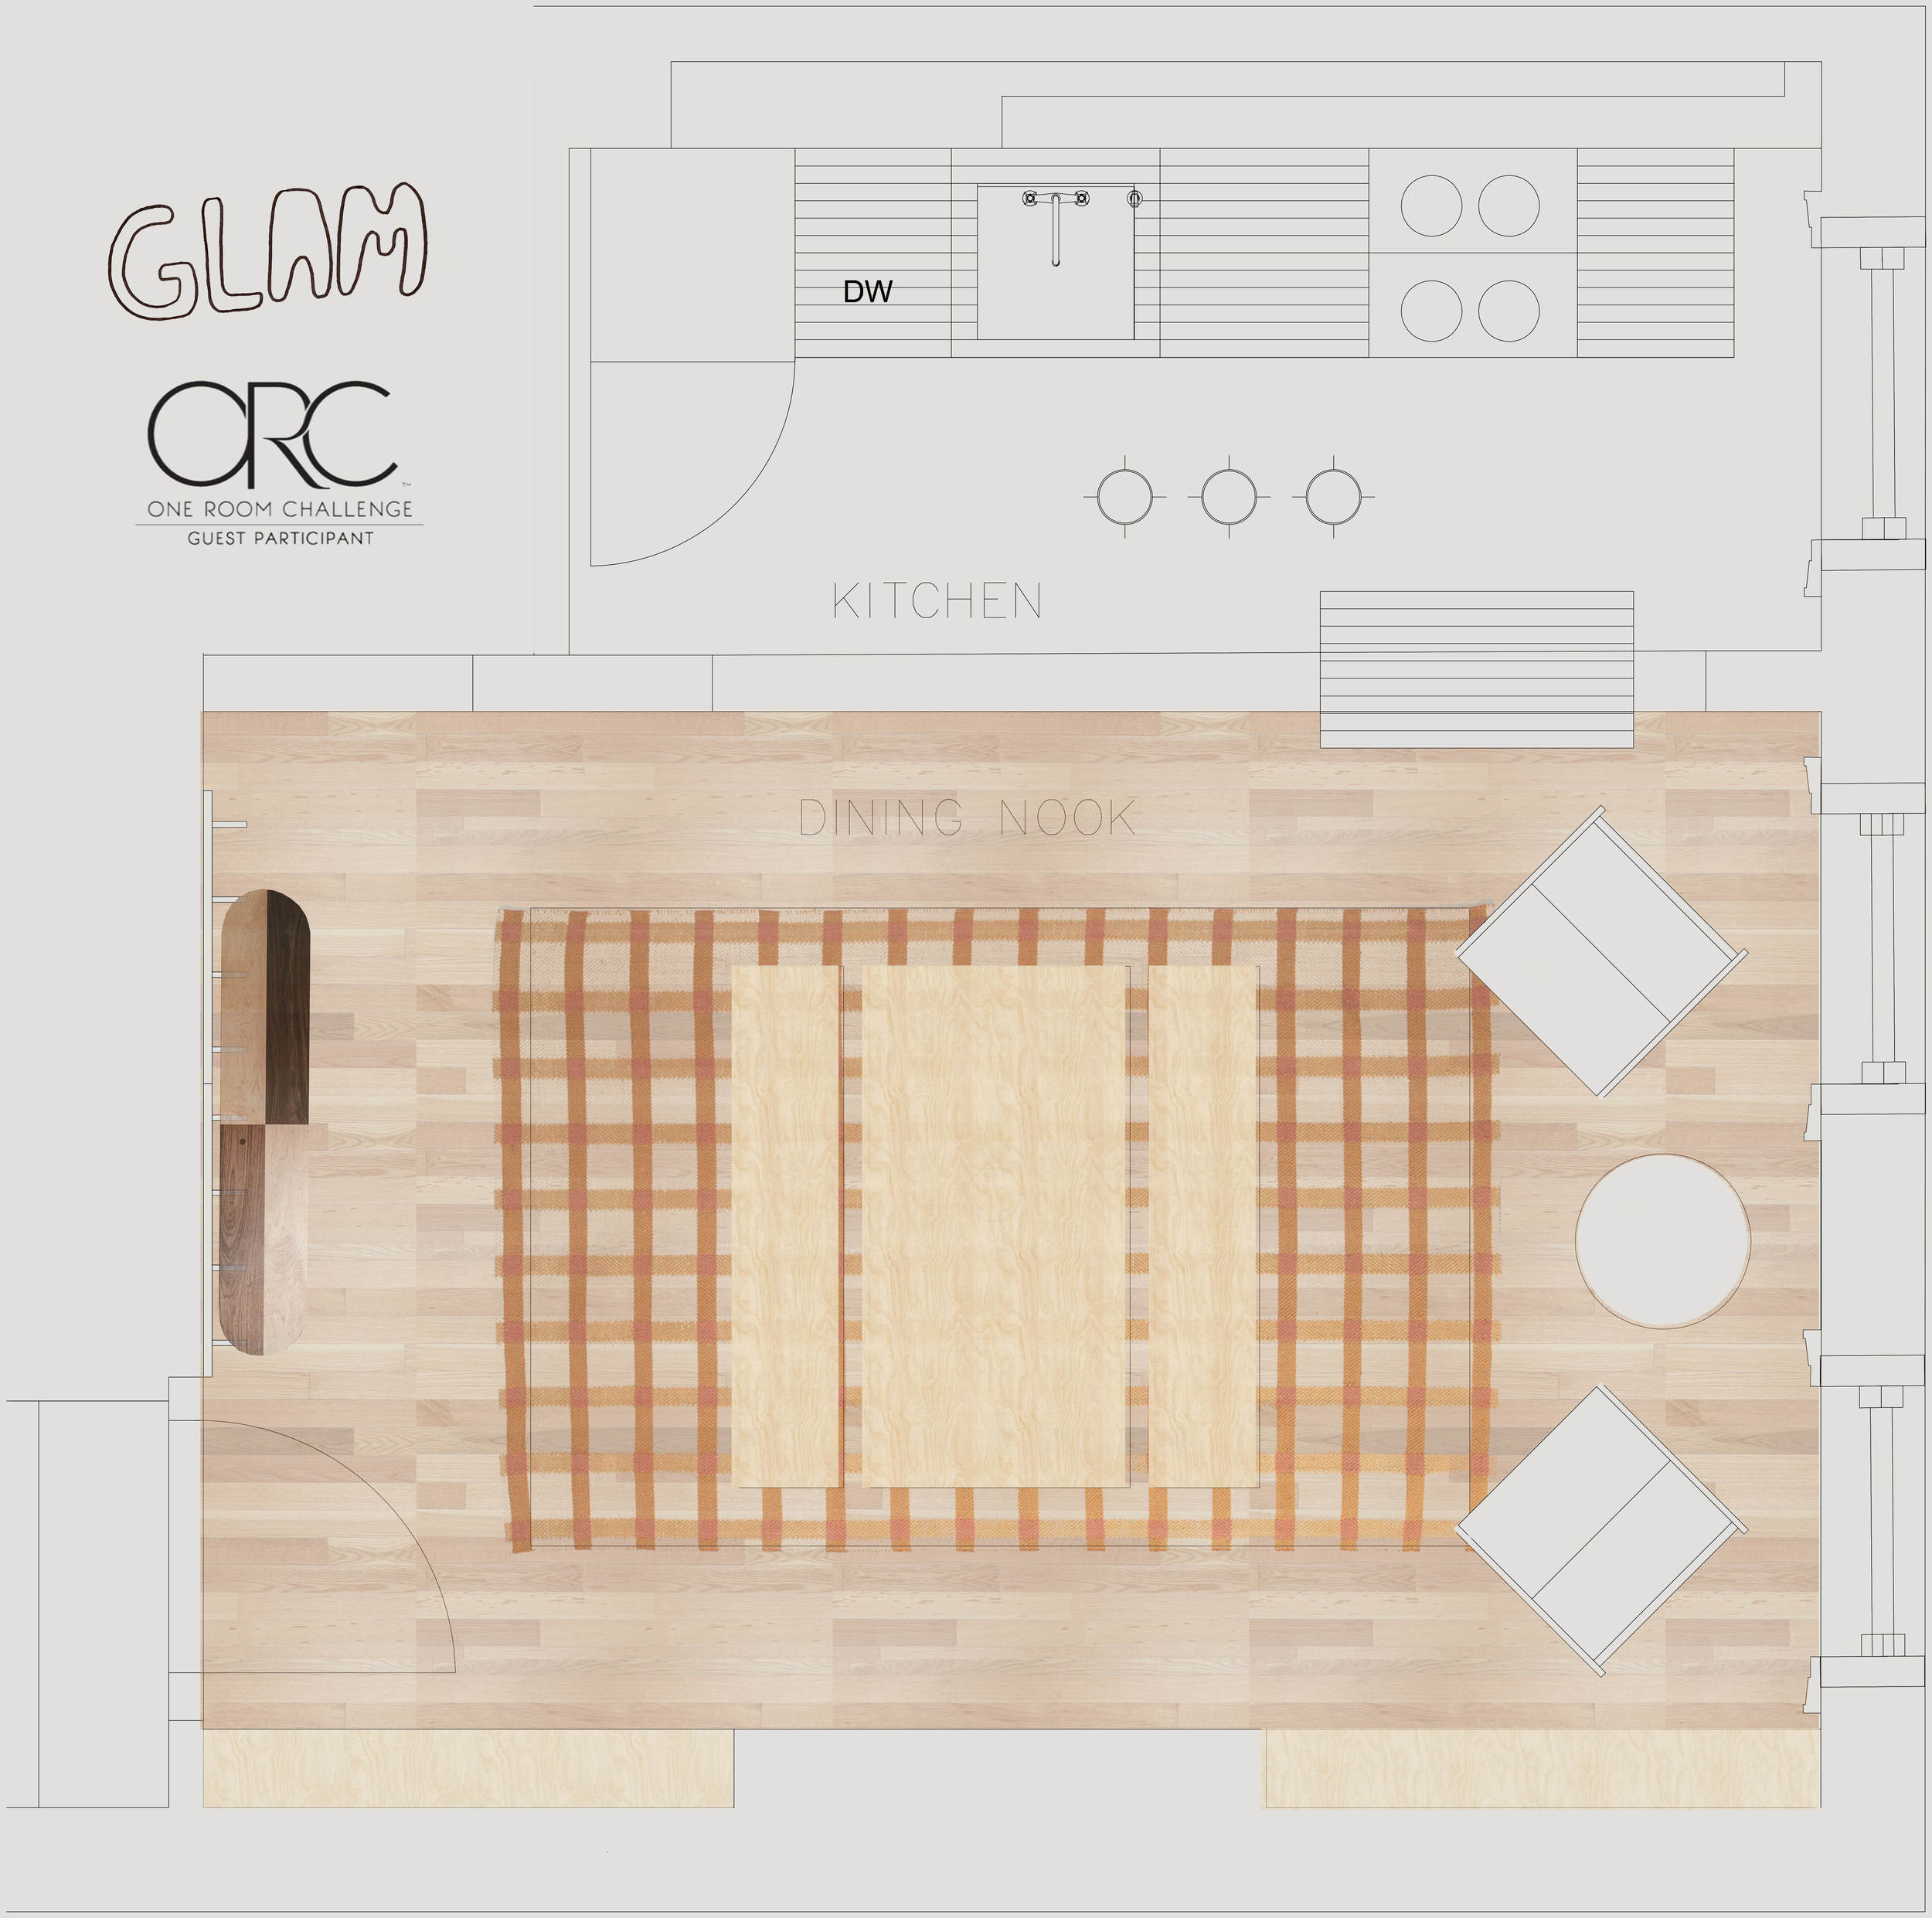
Here we are at week 2 of the One Room Challenge hosted by Better Homes & Gardens! Today we’re sharing the design concept for the dining room portion of the project. Traditionally the top floors of Brownstones are less formal and more minimal in decoration, which created the perfect opportunity for us to lean into modernism a little but more with selections from a Pacific Northwest favorite Schoolhouse, our own studio and a few other favorite companies shared below! Currently we are finishing up some framing and are almost ready to hang sheetrock! We may have given up on doing the paint stripping/millwork restoration ourselves and are looking to hire out that work. It was messy and took waaaaay too long! We’re so excited to get out of the construction phase and into finishes and furnishing but still have a ways to go.

We pulled colors and materials that felt energized and happy but grounded in warm, subdued tones. I always love rusty reds, mustards, tans and white together with some accents of off-black shades. Wool, metal, leather and wood are materials that we love to use time and time again for their beautiful, natural qualities. We incorporated Birch plywood because that’s our favorite material to work with for furniture as well as built-ins. It’s modern, sturdy and inexpensive.
This dining space needs to act as an extension of our kitchen because storage is so limited, so color needed to feel complimentary as well between the two spaces. We’ll be sharing the design concept of the kitchen portion in the next couple of weeks so stay tuned!
You’re probably wondering why we have the kitchen and dining room upstairs next to the bedroom and nursery. It is strange we agree! We did it because the original layout of our Brownstone had the top floor as one apartment and the two lower floors as the other apartment, therefore that is how all of the plumbing is set up. We knew that long term we wanted the top two floors because the features are just better - more natural light, millwork, tall ceilings, etc. Moving plumbing was not an option because of our short timeline - so we’re leaving the kitchen where it is and will eventually (phase 2) drop it down to the middle floor where the living room is. For now we’ll embrace it as a cozy dining/lounge space where we don’t have to travel too far from the baby, which will be great especially for those first few months.

Included in this mood board are items we either already have (and love) or are dreaming of incorporating into the dining room (I’m looking at you Alvar Aalto lounge chairs). Schoolhouse has a new Holiday line that they’re releasing shortly so we might want to swap out a few things when that drops!
Thank you for following along on this renovation journey, we’re glad you’re here! See you for week 3!
Schoolhouse | Plaid Wool Rug in Tawny
Schoolhouse | Ray Pendant
Tuft & Needle | Dog Bed in Rust
Schoolhouse | Francis Dining Chair
GLAM | Circle Square Table
Benjamin Moore | White Dove Wall and Trim Paint
Parachute | Linen Waffle Napkin Set in Natural
GLAM | Chelsea Bench
Schoolhouse | Hand Blown Carafe
Schoolhouse | Tangerine Fringed Throw
Ekena Millwork | 24” Ceiling Medallion
PC Hardwood | Prefinished Engineered Amber Oak 1/2″ X 3 1/4″
P.F. Candle Co. | Cedar and Sagebrush Candle
Toiro | Kamado-san - Double-Lid Donabe Rice Cooker
One Room Challenge - Week 1
We are very excited to announce that GLAM Studio is a guest participant in the @oneroomchallenge sponsored by @betterhomesandgardens and it’s WEEK 1! As you know we’ve been working on bringing our #brooklynbrownstone back to life over the past month at rapid speed (this baby is growing at an even faster rate!). When we saw there was an opportunity to participate in the Fall 2021 session of #oneroomchallenge we jumped on it because hey, we’re already in the thick of it!
Over the next 8 weeks we will be sharing specific updates on how we are renovating the upstairs KITCHEN and DINING area alongside the rest of our renovation (the other 10 rooms). I’ll share in our stories design inspiration, material samples and floor plans along with any process video so that you have all the details! Please share with other people you know that might have fun following along - and let’s go!

GLAM Studio - Will and Aubrey

Front Door

View Towards the Kitchen

The Center of the Room

The Reading Nook